Dynamic Instrumentation: Frida And r2frida For Noobs
radare2 r2 frida r2frida ctf reverse-engineeringOne of my main takeaways from this year’s r2con is that Frida is cool and that r2frida, the integration with radare2, is even cooler. Using this, it’s possible to pair the benefits of dynamic instrumentation of Frida with the analysis features and workflow of radare2. This is a small tutorial to get started with both Frida and r2frida that’s based on the r2xor challenge of the recent r2con CTF. Please note that this is not a complete writeup for r2xor.
The Challenge
An Android apk file is given that contains the flag somewhere embedded into it. Based on the challenge name, it can be assumed that the flag is stored as a XOR encrypted value somewhere in the app, along with a static decryption key for it. The plan is to instrument the app using Frida in order to dump the flag. This is possible because the app uses the function:
sym.check_flag_char_const___char_const(int32_t arg_4h, int32_t arg_8h)
to check whether the user provided the correct flag. It takes two string pointer parameters: A pointer to the user input and a pointer to the correct flag, in whichever form. By hooking this function, the expected flag value can be read and the challenge is solved. Good plan for now.
The app comes bundled with a native library called libnative-lib.so that contains the validation function above. Therefore hooking has to be performed in this native library. Also, the app checks whether the device its running on is rooted. If this is the case, the app won’t run and will display a blank screen instead.
Working Environment
I’ve used the Genymotion Android emulator. This runs x86 based pre-rooted Android devices on a local machine and exposes an adb port for easy shell access. I’ve replaced the adb binary of Genymotion with my local version to prevent errors caused by incompatible adb versions.
Frida comes with both a server and a client component. Therefore the next thing to prepare is a new pipenv with the Frida client installed. If you don’t use the newest version, a bug can occur that prevents hooking functions that are executed early in the application life cycle, such as onCreate(). Calling frida-ls-devices should show a virtual Android USB device in case the Genymotion VM is running.
The latest Frida server release can be downloaded with the correct architecture, x86 in this case, and uploaded to the running Android device:
adb push frida-server /data/local/tmp
Don’t forget to set the executable bit and to run the Frida server as root from an adb shell.
The last thing to do is to install r2frida using the radare2 packet manager:
r2pm -ci r2frida
Bypassing Root Detection
The first method that will be executed when launching the app is onCreate() of the class MainActivity. This is the decompiled code of it:
public void onCreate(Bundle paramBundle) {
    super.onCreate(paramBundle);
    setContentView(2131296284);
    ((Button)findViewById(2131165219)).setOnClickListener(new a(this));
    if (!n()) {
        ((TextView)findViewById(2131165274)).setText(stringFromJNI());
    } else {
        System.exit(1);
    }
}
The app terminates in case n() returns true. The first thing n() does is creating an instance of the RootDetection class and proceeding with the root check. In order to run this app on the rooted device, it would therefore be convenient to force n() to always return false – Frida to the rescue.
The plan is to launch the app using Frida while replacing n() with a function that just performs a return false. I’ve used this script for this task:
#!/usr/bin/python3

import frida
import time
import sys

js = """
Java.perform(function() {
       var mainActivity = Java.use("re.rada.con.ctf.r2xor.MainActivity");
       mainActivity.n.implementation = function() {
           console.log("[*] Root check called");
           return false;
        }
       console.log("[+] Hooking complete")
})
"""


def on_message(message, data):
    print(message)


device = frida.get_usb_device()
pid = device.spawn(['re.rada.con.ctf.r2xor'])
print("[+] Got PID %d" % (pid))
session = device.attach(pid)
script = session.create_script(js)

# Callback function
script.on('message', on_message)
script.load()

device.resume(pid)

sys.stdin.read()
print("[!] Exiting")
Frida itself spawns the app on the device, sets up the hooks, injects JavaScript code into the target process and resumes the process afterwards. This allows various modifications to an application, such as the ones defined in the js variable. Lets’ break it down:
- It’s required to hook a function of the
MainActivityclass. In order to do this, we retrieve the class and assign it to a variable withJava.use()for later use. - The
n()function will be replaced with our own version that just returnsfalseevery time. Theimplementation()function performs just this. You could also call the original function withthis.n()in case you would want to inject code before or after the original function. - That’s it! Root check bypassed.
It’s important to call device.resume() after script.load(). Otherwise early functions, such as onCreate(), can’t be hooked correctly in case you are required to do so.
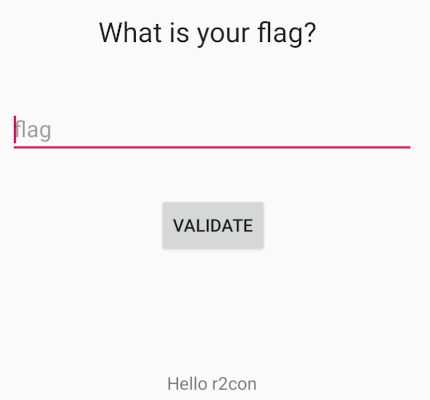
Calling this script will spawn the application on the device, with the root check bypassed:

Time to get the flag.
Tracing Function Calls With r2frida
It’s now necessary to get the values of the parameters for the check_flag() function. You could solve this entirely with Frida, but I’ve decided to utilize r2frida and its tracing capabilities. Tracing in this context means that function calls can be observed dynamically while printing the passed parameters.
Let’s open the application in r2frida:
r2 frida://attach/usb//<PID>
Tracing can be set up with the \dtf command, as seen in this wiki page. Remember, all r2frida commands have to be prefixed with a slash.
Let’s check the help text of this command:
[0x00000000]> \dt?~dtf
 dtf    trace format
[0x00000000]> \dtf?
Usage: dtf [format] || dtf [addr] [fmt]
  ^  = trace onEnter instead of onExit
  +  = show backtrace on trace
 p/x = show pointer in hexadecimal
  c  = show value as a string (char)
  i  = show decimal argument
  z  = show pointer to string
  s  = show string in place
  O  = show pointer to ObjC object
Undocumented: Z, S
 dtf    trace format
The onEnter (^) and string pointer (z) parameters seem to be fitting for this case. Now only the address of the function to be traced is required.
The offset of the validation function is 0x00007330, as determined via:
r2 -q -A -c "afl~check" libnative-lib.so
0x00007330   28 271          sym.check_flag_char_const___char_const
The start address of libnative-lib.so in the target process can be determined as follows in r2frida:
[0x00000000]> \dm~libnative
0xcad88000 - 0xcadb6000 r-x /data/app/re.rada.con.ctf.r2xor-sROpLQAWfATDWNdVkEW8XA==/lib/x86/libnative-lib.so
[...]
Now the address of the function to be traced can be calculated using the library start address and the offset:
0xcad88000 + 0x00007330 = 0xcad8f330
Let’s set up the tracing:
[0x00000000]> \dtf 0xcad8f330 zz^
This traces the function when entering it and prints the values of two string pointer parameters.
Clicking the Validate button in the app now prints this in r2frida:
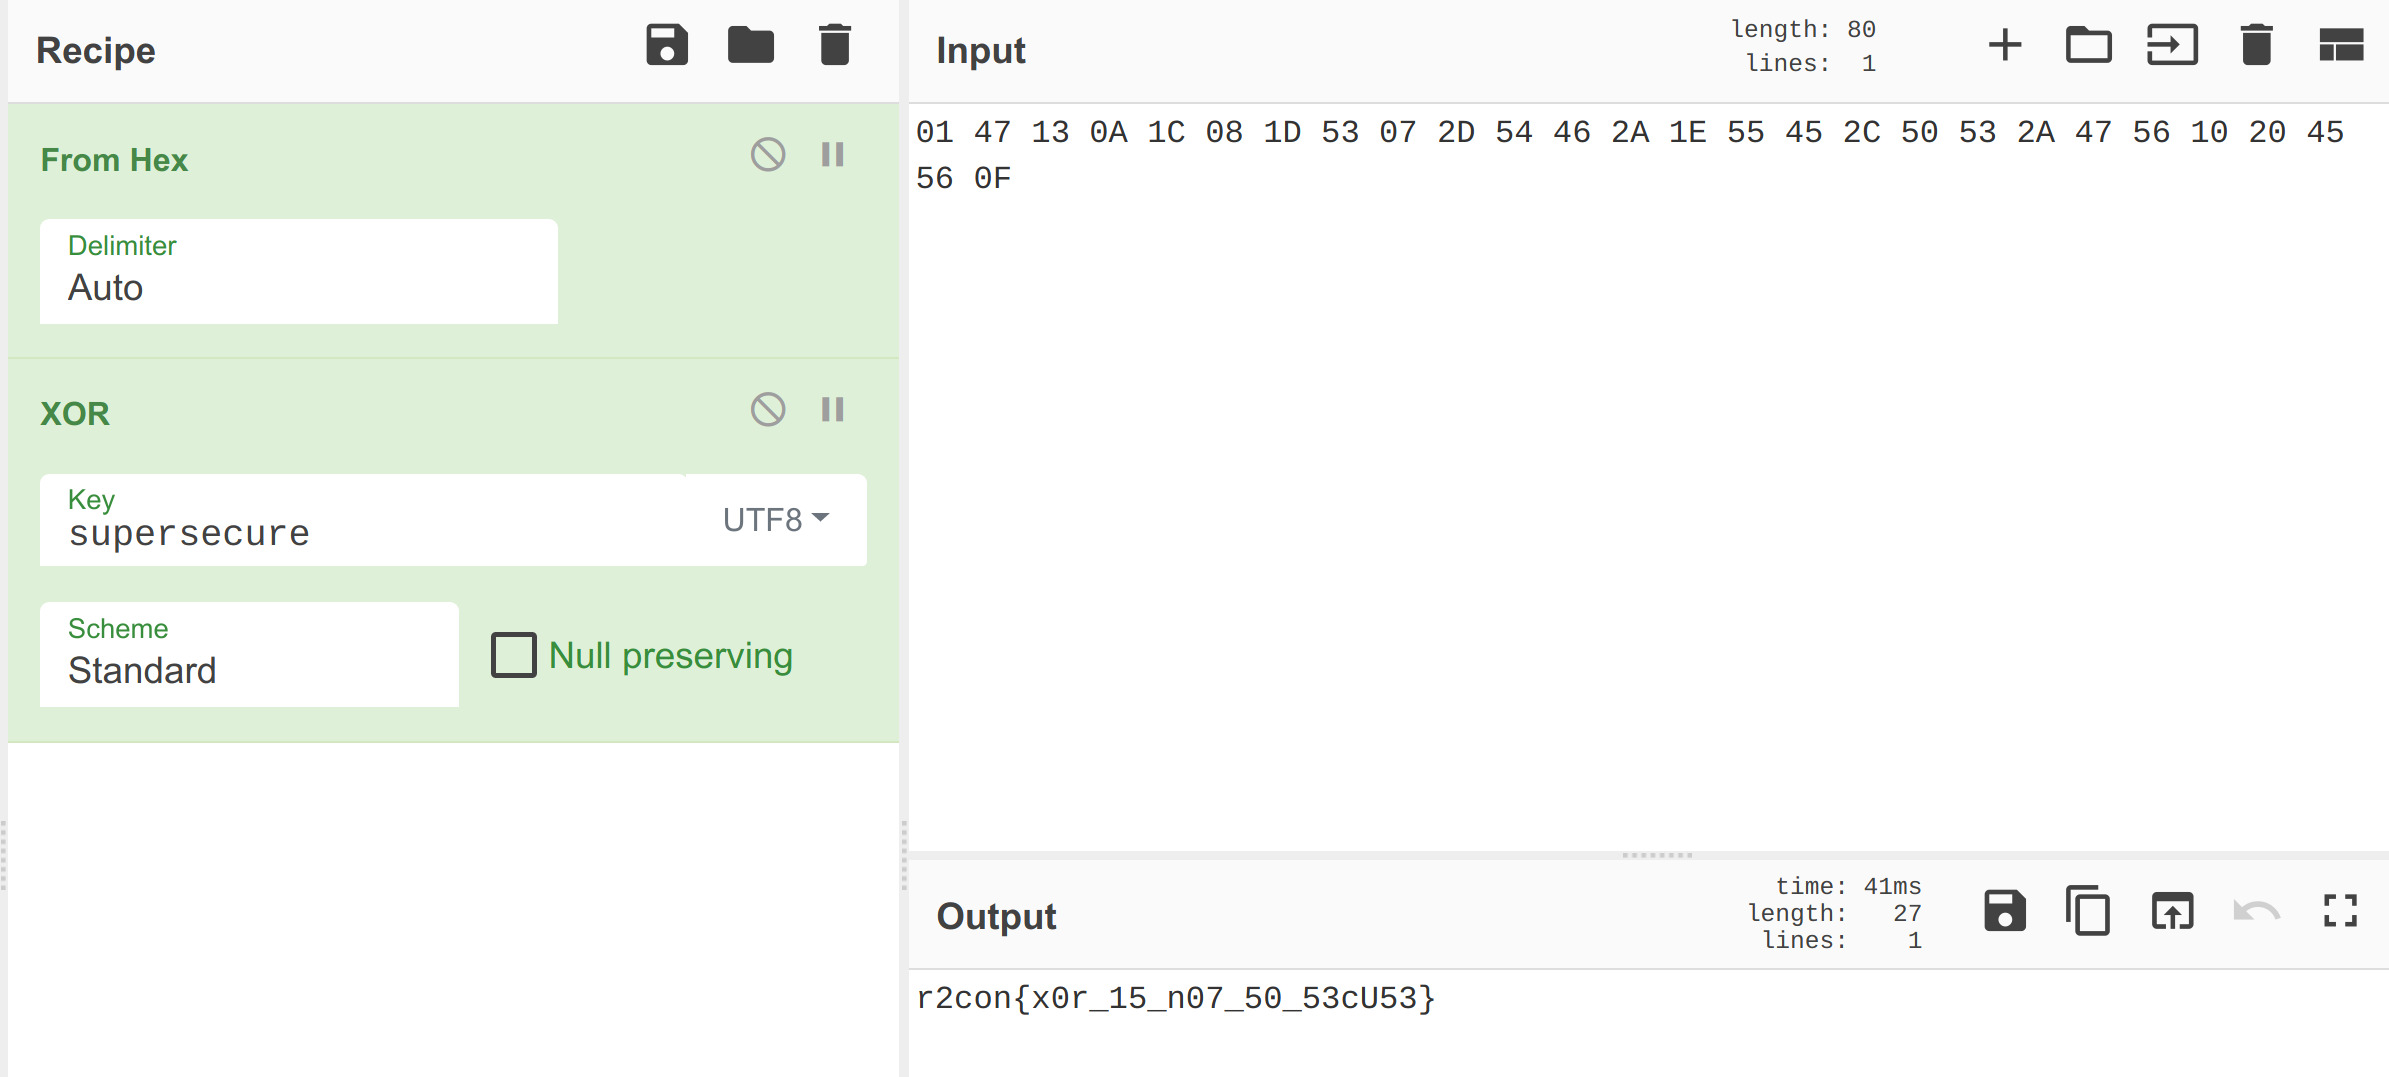
[TRACE] dtf 0xcad8f330 (0: "�kB�" 1: "\u0001G\u0013\n\u001c\b\u001dS\u0007-TF*\u001eUE,PS*GV\u0010 EV\u000f") 0xcad8f2a0 libnative-lib.so 0x72a0 0xcb19d177
The first parameter (0) contains trash (empty user input) and the second parameter (1) contains an interesting string that represents the expected flag value. This value has to be decoded (removing the \u notation) and XOR decrypted with the key supersecure. This key was determined using reverse engineering of the shared library. This is the flag, as determined with CyberChef:
